You might have finally decided to install roller blinds for your windows. Well, we support this decision because these blinds do offer a touch of elegance to room decor.
As always, we have got you covered on this window covering treatment. This blog will tell you how to install roller blinds; your comprehensive step-by-step guide.
Make A List of Materials You Will Need
You are starting the DIY installation for your new roller blinds. To do that, you will need to gather all the right tools & materials for it. The following are the things you need.
- Your new Roller Blinds
- Mounting brackets which come with the roller blinds package
- Screws & Plugs
- Pencil
- Measure Tape
- Drill
- Screwdrivers
- A Level
- A ladder
- Safety Goggles
Install Roller Blinds – Step-By-Step Guide
Step 1. Measure The Windows Accurately For Install Roller Blinds
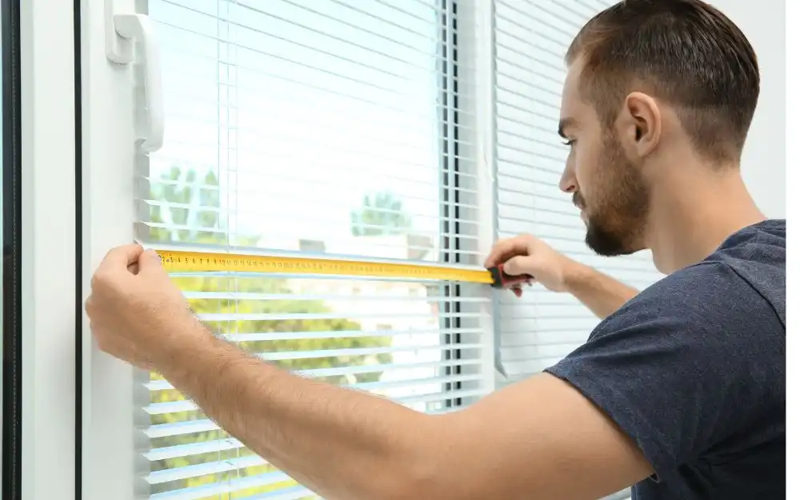
You need to do precise window measurements to have a perfect fitting. There are 2 different mounting types for window frames.
- The Inside Mount: For this, take measurements for the width of the window frame from all sides. Use the tightest of the measurements to ensure a secure blind fitting.
- The Outside Mount: Measure the width of the window frame that blinds need to cover. This measurement can be wider than the window. The same goes for the height of the window.
With your measurements for either mounting type, take the measurements and buy the right fit roller blinds. Be sure to get the necessary mounting hardware like screws & brackets.
Step 2. Ensure Proper Bracket Places
Placing the brackets for install roller blinds is a critical part. With the right placement of brackets, your blinds will function smoothly. This is how you mark the spot for brackets.
- For your inside mount, mark the bracket space at the top corner of the frame. With a pencil mark the areas where screws will be drilled.
- For the outside mount, place your brackets atop the frame. Be careful about aligning the brackets. Take the pencil to mark the holes for screws.
Step 3. Do The Drilling For Pilot Holes
We recommend drilling the pilot holes as they offer easier insertion of screws. These holes also lessen the chance of plaster or wood splitting apart.
- Choose the right drill bit size that matches with the size of the bracket screws.
- Wear your safety goggles before drilling and do drilling in the pencil market spots. Make use of the wall plugs, in case you are drilling in plaster. This gives stability while drilling holes.
Step 4. Time To Attach Brackets For Roller Blinds
After your holes have been drilled, it is time to attach the brackets. Ensure these short tips when doing so.
- Always place the brackets over the pilot hole and ensure they are properly aligned.
- With a screwdriver, start fastening the screws to secure your brackets. Check afterward if the bracket is leveled or not.
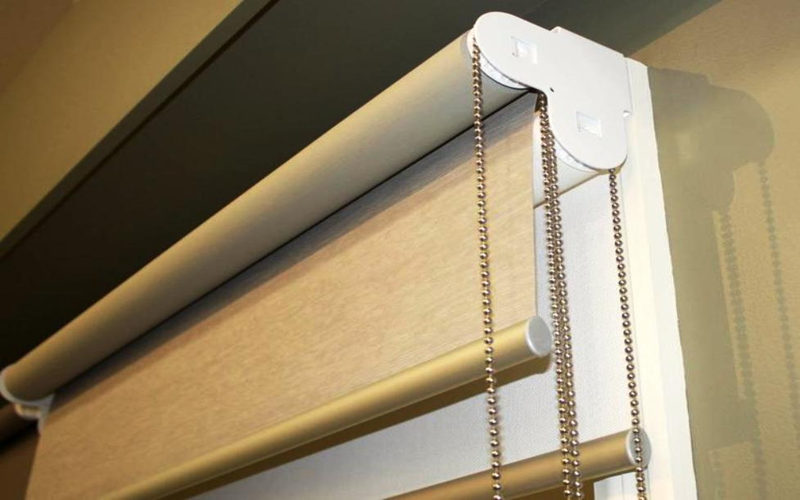
Step 5. Install Your New Roller Blinds

This is the part where you will be ready to install roller blinds.
- The installation of window blinds depends upon its design & shape. You might need to either snap them into the bracket or insert them in individual bracket spaces.
- There are also locking mechanisms for roller blinds or you can secure them with screws. Fasten these screws in place tightly to not let them fall.
Step 6. Check Your New Blinds For Functionality
With your new blinds or curtains installation, it is time for you to check their open & shut function.
- Pull down the blinds completely and then retract back to see if there is any issue or not.
- If the level for blinds is misaligned or there is obstruction during opening & closing, do the necessary fixes to the blinds.
Step 7. Adding The Safety Cord (Optional)
Many roller blinds suppliers provide blinds with a safety chain or a cord. These safety cords or chains are helpful in preventing accidents for homes with kids & pets.
- Attach the safety cord guide to your window wall or frame with screws.
- Pass the safety chain or cord through this Cord Guide – ensure it is fully tight and away from children’s reach.
Some Tips In Case Of Improper Roller Blind Installation
You can plan all you want but as a first timer, there are still going to be some troubleshooting issues. These are some of the common problems and their quick fixes.
i. Your Blind Doesn’t Fit Properly
There are specific window treatments for every room which are designed to look and work perfectly. Do double-check for the window frame measurements and see if the blinds you got are of the right size. Trim if they are too wide or replace them for the correct size.
ii. Your Blinds Feel Crooked
In case your blinds are misaligned from either side, take a spirit level to check the bracket alignments. Adjust as per the need.
iii. Your Blinds Do Not Roll Properly
For this, check to see if the blinds have been seated properly within the brackets or if there are any obstructions. Lubricating the mechanism often helps.
Some Maintenance Tips
If you wish to install roller blinds for a long time, here are some helpful maintenance tips.
- Do regular dusting with a clean cloth or vacuum the blinds.
- Do a periodic check of the roller mechanism & brackets for loosening.
- Keep your blinds protected from liquid spills to prevent molding or other damage.
Our Final Say
Our comprehensive step-by-step guide on how to install roller blinds will put you on a fast track for efficient window treatment. Always do careful planning and follow the instruction manual of the roller blinds manufacturer and this guide by Arabic Curtains to do the right fitting. Now, grab your toolbox and get on with roller blind installation.